|
|
|||
|
|
| LiftAmerica Conversion | Downloads | Enrollment | Kiosk Use Guide | Login Guide | Troubleshooting | Kiosk Testing |
|
Student Enrollment
New Elementary Student Enrollment
When a teacher is enrolling a student in the LiftAmerica program, there are a few informational items that will help him or her to find the correct forms and fill them out accurately.
On a school or home computer, open your web browser to the Internet address given for the school’s LiftAmerica web site. This address will always have four (4) elements: 1) an identifying school name and 2) state abbreviation, followed by the 3) LiftAmerica domain name and 4) address extension, such as: www.watson.ut.liftamerica.net or www.skyline.ny.liftamerica.net.
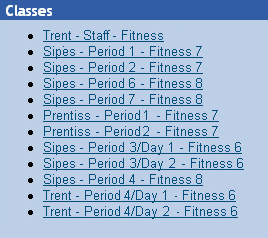
Login using your teacher username and password. On the school page there is a list of classes. See the sample Classes block below.
Clicking on the underlined class title takes you to the Teacher’s Page for the selected class, example below. Click on the Add A New Student link.
The Elementary Student Enrollment form is on two pages and is divided into five (5) short sections - Personal Information, Contact Information, Online Profile, In case you forget…, and Subscription Preferences. Use the mouse to click in each field and type in the correct data or the tab key to move the cursor from one box to the next.
The first section contains the student’s personal information. Five (5) of the fields are mandatory, as shown by the use of asterisks
Please make every effort to be accurate and complete when filling out this information. LiftAmerica recommends that the teacher survey the students for all information, including a current e-mail address, prior to accessing the Add A New Student forms.
< the first letter only, unless the official spelling of the name indicates otherwise. < the first letter only or as legally capitalized (i.e. MacAdams, deWaal, O’Toole and similar names are preferably spelled with multiple capitalizations or mid-word capitalization only.). < < < Jan 1, 2001 January 1, 01 1/1/2001 01/01/01 may be typed and will be standardized by the system, but should be checked for accuracy after completion. < Race – This field may be filled in by clicking the arrow, causing the drop-down box to appear. Mouse over the line items in the box until the correct word(s) is/are highlighted, then click. The selected word(s) will appear in the field box.
Section two contains the student’s contact information and should be updated as becomes necessary.
< appropriate (i.e. Aspen Avenue, Bountiful Boulevard, Lois Lane, Stoddard Street.). Abbreviations such as - N, S, E, W, Ave, Blvd, Apt and # are acceptable. < < ca CA California CALIFORNIA may be typed and will be standardized by the system to be the uniform two-letter USPS state abbreviation. < the system will hyphenate in the correct position. < number extensions and cell phone numbers are allowed by the system, but should not be used except when a main household number is not available.
At the bottom of this page are four (4) buttons. Previous
The Online Profile is the first section of page two. As is the case on the previous page, it contains asterisks
< to remember. A variation of the student’s name is commonly used to construct a username, such as jlsmith for John Lee Smith. Since there are many names in common and each username must be entirely unique, it is also advisable to add numbers to the name, such as jlsmith9876. Additionally, the username is case- sensitive. Whenever the username is typed within the system, it must be typed with the exact same spacing, numbers, capital and lowercase letters as are entered in this field. < remember. This password is also case-sensitive. Whenever the password is required by the system, the spacing, numbers, capital or lower case letters must be typed exactly as typed in this field. < password field. Be sure to type the password exactly as above. If a difference exists between the two fields, an error icon save until the error has been corrected. < his/her username or password. To access the questions, click the arrow and scroll down the list until the preferred question is highlighted. Click to select. < < html, then the Not Formatted radio button should be clicked. Otherwise, the formatted button should remain selected.
When this page is complete, click the Save


|
|||||||||||||||||||||||||||||||||||||||||||||||||||||||


 . If an asterisked field is not filled in or is filled in incorrectly, an error icon


